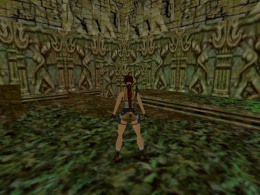
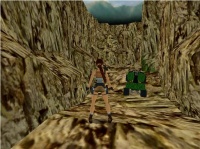
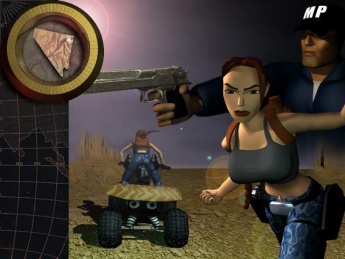
Tomb Raider III Story
|
Editing Notice This article will develop over a large period of time, and until the base layer of it (a full plot) is completed, I urge anyone not to edit or change it in any way. |
Contents
Introduction
The following article will explain in high detail the story-line of the 1998 Tomb Raider III. This page, though, does not include high-detail walkthrough information of each level, that can be found in the tombraidergirl pages, but instead the cutscenes and FMV's seen throughout the game. Also, this article will suggest ideas on tackling certain obstacles or enemies, so it can generally be placed between a walkthrough and a game synopsis story. Some descriptions in this article will act as a low-detail walkthrough as the best way to express the information, but proper walkthrough text is a lot more helpful and better in this circumstance. For further information on this and other aspects of the management and content of the article, please see the Discussion page.
A lot has happened since Tomb Raider II. Lara Croft is becoming more and more realistic, in the sense that she now can perform new moves that people would expect from her, such as sprinting, or crouching. Along with more intricate levels, Lara is also more detailed, and now has access to more vehicles than ever before, such as a Kayak, Quad Bike and Underwater Propulsion Unit. Other new aspects are as follows:
- Newer sounds in the game also improve the overall reality. The guns shots actually sound like proper realistic guns shots now, and Lara makes different footstep noises for the different surfaces she walks or runs on. Enemies, such as Tigers, benefit from these new intricate sounds.
- Enemies have a better recognition and artificial intelligence than previous games. Now enemies can sometimes run away from Lara's shots, or even stealthily crouch out of sight so Lara does not know where they are.
- Instead of the usual "always kill the enemy" method used in the previous two games, Tomb Raider III introduce some stealth, rather than all action. By this, Lara may have to sneak by an enemy to get an item, or to continue in the level, or to stop them from making a section of the level much more difficult. If they are alerted, they may attempt to close a door that could lead access to a quicker level route, a secret or pick-ups. In most circumstances when you find circumstances like these, you are probably weaponless, in the High Security Compound and the Area 51. Commonly, human enemies don't always know you're there until you enter their line of sight or fire bullets.
- For the first time in the series, the usual linear gameplay of Tomb Raider is now nonlinear; After the four India Levels, Lara can choose which of the next three locations she wants to go to, and for every location, Lara has a new, and interesting outfit. Also, some of the levels, for the first time in the series, have more than one way to successfully complete them.
However, on a more critic tense, Tomb Raider III introduces Code Disks, laser-activated turret guns, carefully bypassing dangerous energy beams, and navigating through a derelict subway. The problem is that Tomb Raider has now practically lost all of its original Tombs which made the first installment so famous and successful. As Lara, at a certain level, is traversing over the city of London to find a particular artifact, it might as well be called City Raider.
These modern locations were removed in the next game in the series; The Last Revelation, which was designed as a resurrection of the original Tomb Raider.
It is unsure how long it has actually been since the end of Tomb Raider II, but it must run into months as of the new construction and decor modifications.
Finally, Tomb Raider 3 introduces music from a more classical instrument selection, rather than the Violin music from the previous game. The main theme music still contains the main theme tune of the previous Tomb Raider series under the construction of Core Design, but modernises it make it purely unique. In all, Tomb Raider III’s music is much more lively than that of Tomb Raider II, which focused on a much more quiet tomb raiding atmosphere and experience.
|
Bugs Tomb Raider III is notorious for it's bugs, such as the invisible walls, or internal code mistakes. Mostly, bugs will stop you from completing the level, or in lesser cases, a secret. Ways to stop the bugs from happening are included in most walkthroughs. Most bugs are activated by saving, or loading, or both, in a particular area. A large bug which effects the entire game can occur when you complete the All Hallows bonus level and play the game again with unlimited weaponry. After completing the India levels, you will only be able to go to Nevada, and from their to Antarctica, missing out two areas, and so two artifacts. There is no 'cure' for this, but some patches developed by websites or Core Design can stop some from happening or minimize the effect. |
Level Map
The following diagrams and captions will show the levels in the game. Nevada, London and the South Pacific can be played in any order. At the end of the third location of the non-linear section of the game, Lara goes to Antarctica for the climax of Tomb Raider III. Selecting a level will take you to the paragraph section on this article.
India- 1 - Jungle
- 2 - Temple Ruins
- 3 - River Ganges
- 4 - Caves of Kaliya
- 1 - Nevada Desert
- 2 - High Security Compound
- 3 - Area 51
- 1 - Coastal Village
- 2 - Crash Site
- 3 - Madubu Gorge
- 4 - Temple of Puna
- 1 - Thames Wharf
- 1.1 - All Hallows bonus level
- 2 - Aldwych
- 3 - Lud's Gate
- 4 - City
- 1 - Antarctica
- 2 - RX-Tech Mines
- 3 - Lost City of Tinnos
- 4 - Meteorite Cavern (Main Boss Level)
The Bonus Level
|
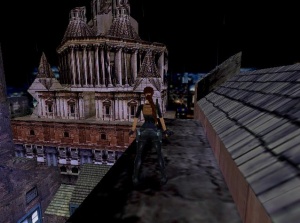
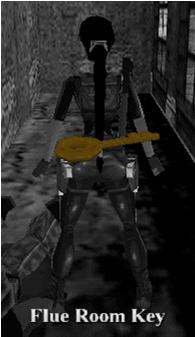
Bonus Level: All Hallows If the player collects all of the 59 secrets in the game (Note - secrets are irregularly numbered in each level), then they can access the secret bonus level after the Meteorite Cavern level. Completing this level successfully will allow the player to play the game again with unlimited ammo, unlike the previous game, when simply finishing the game once can grant this option. All Hallows was meant to be set between Thames Wharf and Aldwych. It is either set in All-Hallows-by-the-tower or St Pauls Cathedral, perhaps explaining the useless Cathedral Key found as a secret at the end of Thames Wharf, and that she was on the roof of this cathedral at the end of that particular level. It is also explains the unlikelihood that an entrance to a derelict subway lies beneath a church bell tower. This level, if unlocked by the collection of the secrets, bases around the interior of the cathedral/church, and is relatively short compared to the other London levels. There is only one key, and an easy puzzle content. |
Prelude
The following paragraphs and sections of information will introduce the story of Tomb Raider III through artifacts and the opening FMV sequence.
Artifacts
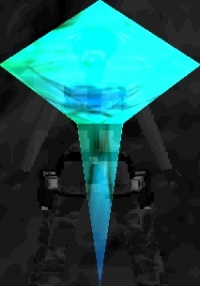
Tomb Raider III is about collecting four powerful meteoric artifacts from various places across the globe. Each individual artifact has it's own unique power, but when all four are combined in a Meteorite Cavern deep below the surface of an island just of the coast of Antarctica, they have the power to rapidly accelerate human evolution. Each artifact, no matter what it's individual power, can mutate an living being to a certain extent, but for pure evolution, all four must be collected and put in their respective places in the Meteorite Cavern. The Artifact name, image, power (if known), owner and location are shown below:
| width="250" Template:Descline | Artifact | width="200" Template:Descline | Image | width="250" Template:Descline | Power | width="250" Template:Descline | Location | width="250" Template:Descline | Owner |
|---|---|---|---|---|
|
Infada Stone |
If a person stabs the Infada Stone into their heart (similar to the Dagger of Xian), they then get the power of levitation and to fire beams of compressed atmospherical energy. |
Originally inside a Indian Temple. |
Worshipped by Infada Tribes, and later stolen by Tony. | |
|
Element 115 |
Unknown power |
Inside an alien UFO, in Area 51, Nevada. |
It is owned by the US Government. | |
|
The Eye of Isis |
Can stop the bearer from aging, and, similar to the Infada Stone, get the power of compressed atmospherical energy and to expel it in deadly, super-charged blasts. |
Sophia Leigh's Office, in the London district of City |
Sophia Leigh | |
|
Ora Dagger |
The Ora Dagger allows the controller to summon poisonous lizards, and to manipulate and control electro-particles in the air, and launch them in a deadly blast of super-charged lightning, and also use them defensively, as in an electro-shield. |
A French Polynesian Island |
A cannibalistic tribe and their leader, the Puna |
Additional Information:
|
Ora Dagger and Element 115 Game Development Mistake An important note is that the Ora Dagger and Element 115 were mixed up during the creation of the game, so in some games, when you complete Nevada, you'll get the Ora Dagger then, and the Element 115 at the end of the South Pacific (though this is just the name; whatever game type the look of the artifact will be the same). |
It was revealed in Tomb Raider III: Lost Artifact, the multi-level expansion of Tomb Raider III, that there was a fifth artifact; The Hand of Rathmore. It powers in the Meteorite Cavern are unknown, so perhaps only four are required for the evolution process. The individual powers of this artifact are also unknown.
Story
The following account is completely from the opening sequence.
The Meteorite
Millions of years ago, after the time of dinosaurs, but before the time of humans, a meteorite survived the high density plunge into Earth's atmosphere. It was around the size of a small house, but may of been larger before the atmosphere descent, which would of burned it down to a smaller size. As the introduction clip shows, the animal inhabitants of a tropical area, actually an Antarctica island, millions of years ago, sensed the meteor coming and were immediately alarmed. A few minutes later, the meteor crashed into a bed of trees, exploding everything around it. Over the next few millions of years, this island area of tropical Antarctica became inhabited by Polynesians, early humans. There, they discovered the meteor, and the strange, unnatural powers that it possessed. The Polynesians worshiped this rock, and sculpted four objects of different shape and power from it; the Four Meteoric Artifacts.
As revealed in a clip in the South Pacific Islands section, the inhabitants of these islands fled when one of the natives was born without a face, due to the over-exposure to the meteorite artifacts, similar to the effects of radiation. This naturally shocked the other tribesmen, and so they fled what they now were calling a 'cursed island'. They left the four meteoric artifacts inside a meteorite chamber beneath the Antarctica islands' surface.
It is here, when all four artifacts are combined, that any living thing can be radically evolved.
Present Day (1998)
The mining company RX-Tech, founded by Dr. Mark Willard, set out a mining and drilling excavation in Antarctica to try to find a rumored Meteorite Cavern, which Willard found evidence of in a diary of one of the sailors on the HMS Beagle (he showed this diary to Lara at the end of the India section - see the Dr Willard paragraph). Currently, one section of the group is drilling into the ice in order to discover anything. Willard is seen speaking to someone on a phone, though the recipient cannot understand him (whether this was because of his deep scottish accent or a low signal, it is unknown). At this time, the drill bit becomes lodged into some rock (this could be meteoric). The drill breaks, just as a snowmobiler drives up, asking Dr Willard to come to Site 2 (another excavation area). Upon the short journey, Willard asks "Find any more meteorite?". The reply from the snowmobiler is "Little younger than that". When they arrive at Site 2, we see a carved polynesian head, like the ones seen on Easter Island, followed by a camera zoom that shows many more embedded into the snow. Willard then approaches a small depression in the ice. Below it is a small wooden block, bearing the name of one of the crew of the HMS Beagle. The inscription on it reads Paul Caulfield, 1812 to 1834. Willard says "This place has a busy history...".India
Lara, has somehow heard of the mysterious Infada Artifact shortly after completing her search for the Dagger of Xian, possibly from the rumours spread among the Infada Tribes around Calcutta, India. At this point, Lara does not know that the Infada artifact is one of a set of four meteoric items. In this section of the game (and the only section) Lara is wearing the Standard Outfit. There is only one human enemy, and that's at the very end. Indian instrument based music is heard occasionally, and a new tropical wildlife background music can be also heard in most of the levels. The rather unncerving background music heard commonly in Tomb Raider I and II has been replaced by a newer remake of this musical background.
India is mainly straight-forward, although does have a small bug located in the Temple Ruins level. Enemies are usually easy to kill (with the large exception of Shiva Statues) and the levels are reasonbly easy.
Note: In India you will enocunter Cobras which will attempt to poison Lara by biting her. If they bite you, you must use a small medi pack (or an equivalent Power-up crystal if you are playing the game on PC) to heal the wound. If this poison bite is ignored, displayed by a yellow flashing health bar that will slowly decrease, than Lara will gradually die.
Jungle
Lara begins Tomb Raider III upon a massive sloped hill in the higher regions of dense Indian rainforest, presently unsure where the rumoured temple, which houses the artifact, is located. The Shotgun is also secretly hidden in this high area, below a small thicket of rainforest leaves, on a flat section of land at the top of the slope. As you inevitably slide down, if you jump onto the fallen tree trunk spanning the width of the slope, you'll meet a rather harmless monkey. In this level only, the monkeys encountered are harmless, unless you shoot them; then they become aggressive (though their attacks don't cause much damage). Sometimes you may have to kill them, because they may of taken some important item that is essential or needed, and will not give it back. They can also be helpful, leading you to helpful places where you can find an item, or switch, or past traps.The Main aim of this level is to locate the Indra Key and use it to open the door to the temple. After sliding down this huge slope at the beginning of the level, Lara must make her way around a forest courtyard, before using a Zipline to access a deep forest area. In this vicinity, Lara re-meets Tigers (they are only present in this level). They are generally as easy to kill as they were in Tomb Raider II.
Similarly to the Tomb Raider II starting level, The Great Wall, this particular level focuses on getting the player familiar with the controls in a more dangerous environment than the Polaroid, and to put them against several traps (though the number of traps and obstacles in this level is no where near the number in The Great Wall).Towards the end of this reasonably easy level, the player has to flood a large outdoor rock chamber to access a switch behind a waterfall which opens an underwater door in the same relative area. Beyond this door is an underwater channel leading to a small room with a ladder (in this room is a tiger). At the top of the ladder lies the Indra Key, but you must claim it quickly before a monkey drops down from the treetops and takes it (if he does take it, you have to kill him to get it). After disposing of another tiger appears on the lower ledge with the Indra Key receptacle (the tiger appears upon claiming the key), the key has to be inserted into the lock. This raises the nearby metal grating, accessing the level exit through some swamp (a main adversary in this part of the India section).
Meeting Tony
The camera descends upon a small campsite just below the area of swampland. Communication equipment is set up, along with tents with lanterns at the front. We hear the portable satellite device crackle into sound as someone tries to contact the people here. Dr Willard is heard on the receiving end, shouting "Tony man, I know you're there!"
Suddenly, we hear a man shout "woohoo!" from somewhere in the vicinity. Lara asks to the area as a whole "Hello? Hello?". A blonde man is seen staggering out of one of the tents shouting
"What!? What do you want from me now!?". Lara, a little startled, replies by commenting "Nothing that taxing..." She then asks if he's all right, because of the absurdity of his previous comment.
"If you'll all stop, I might be just fine, just a hundred percent, just, augh!" He grasps his head during this sentence.
If you'll all stop? Who are you talking about? replied Lara, as she was the only other one there.
"All of you, hundreds of you, talking and chattering and breaking my brain up!"
It is then clear that this man, Tony, is suffering from Jungle Fever, and Lara questions his sanity by her reply to that rather mad statement; "Mhm... Well I'm not quite sure where you're coming from, but I just want to know about the Infada Artifact, in the Temple up there." The camera angles up to look at the entrance to the temple.
"Voodoo magic and all, huh? I don't touch the stuff myself" comments Tony. His absurd comments are now starting to annoy Lara.
"It's not voodoo, look, is there anyone else here?" asks Lara, as there is more than one tent in the area."
"Yeah, Randy and Rory..." At this point, Tony starts packing away the equipment around the campsite.
"Randy and Rory? Where? What are you all doing here?"
"Well, they're staying put, in that temple" he says, as he puts a sleeping bag into a metal crate. "I told them not too, I warned them first. Not doing much now I doubt... under half a ton of mudslide."
"Me?", he continues. "I'm leaving." He puts the green laptop and the satellite device into the crate. "Next bus out. This jungle has rooted enough rot into me. I'd offer the same advice to you, but you don't seem like the type to take it, to care if I said you're gonna die in there."
He laughs coldly as he moves up to the edge of the campsite, above a rock ledge, and actually leaving the crate behind. "Yeah, die..." He jumps off, laughter echoing in the distance.
Lara, despite what Tony said, walks calmly into the temple.
Temple Ruins
Temple Ruins is the lengthiest level of the India section, and focuses on collecting five Key's of Ganesha. This Temple, possibly called the Temple of Indra, was the main fortification of the Infada Tribes who worshipped the stone, until they abandoned the temple and left it in ruin. This level also introduces huge Shiva Statues which are only seen in this particular level of the game. Shiva Statues are similar to the Xian of Tomb Raider II. They start out as stone ornaments, and indeed, some are just stone objects, but others come alive when Lara moves to a certain position. They are the first enemies in the Tomb Raider series so far to be able to protect themselves from gunfire. Alive Shiva Statues use their six swords (or Scimitars) to shield themselves from bullets. For this reason, it is best to use the Pistols instead of any other available gun because you might waste ammo on them when they're protected. To lower their swords and continue firing, you must either hang and drop (then pull up) from a ledge (if you're on one) or move around constantly around the floor, until he lowers his sword. You are safe even on a ledge four clicks high (or the size of a normal movable box), and the statues can't hit you from there. When they eventually succumb, they fall over and turn back into statues. Two of the several Shiva Statues will drop a Scimitar each, and these are to be placed upon a third inactive Shiva Statue to open a nearby door.Lara starts this level in a small riverside bank. In the area are two cobra and a switch, which accesses a tunnel below. In this tunnel, are two monkeys, which are now hostile to Lara (although they cause little damage). Lara first must ascend to the tree tops above where she began the level, by climbing up a huge mudslide. Then, she must maneuver past, over and through a waterfall and access the first section of the temple, which contains one inactive Shiva Statue. However, the adjoining chamber, accessed by crawling through a small tunnel, does have an alive Statue, which activates when Lara enters this room through the tunnel.
Fighting Shiva
Fighting Shiva can be easy when several elements are put into action, and one of these is taking advantage of the artificial intelligence that the Shiva Statues hold. First, you must decide upon which of the following two tactics you wish to act in fighting a Shiva.
- Fighting in the Field
- Ledge Protection
Fighting in the Field is for those confident in fighting these large giants. You do get better action, which is what mainly the series are about, with this method, but it puts you at more risk. Simply, you must run and jump in all directions to escape the Shiva's blade. When it lowers it's swords, shoot in the period he is susceptible (still jumping), and when he raises them again to protect himself, stop shooting. If you continue shooting, he will not lower his swords. Just jump away from him until you can hear him retracting his blades, and, depending on your position, then change direction to shoot. Repeat the overall method until he falls.
The Ledge Protection is for either first-timers or for those uncomfortable with fighting in the field. It can be much slower than the previous method, but definitely much safer. In any area where you fight a Shiva, there will be a ledge in which you can take cover on. Shiva cannot strike you even on lower blocks (minimum height is 4 clicks tall). Try to get onto a ledge as quickly as possible if a Shiva is coming to life, and once there, shoot until he protects himself. When he does, either hang and drop from the ledge and then immediately pull up or run and jump to another ledge if one's there. If the ledge in the room is too low for you to hang and drop, then you must fall back and then climb back on. Once you move, or pull up, the Shiva will lower its swords and you can fire once more until it protects itself again. Then repeat the process until it's dead.
Although, these are just suggestions. In any Tomb Raider, for any enemy, you should find your own way of dealing with them.
Deeper Temple
In the same room as the first alive Shiva, there is a large doorway requiring two Key's of Ganesha in order to open it. Opposite the door way is a ledge with two switches. Both pulled will open one of th, and e two doors in the same area, and the other door will open when a switch below a trapdoor in this room is pulled. Beyond each door is one of the two Keys of Ganesha needed (beyond a series of traps, obviously). It doesn't matter which direction you head first.Right Gate
Through the right gate, the door closes behind you, and you must follow and area of swampland and mechanical blades traps (along with poisonous darts). At the end is a large room full of blocks and a main central structure. One block can be moved, so you can access a door on a higher tier, which opens when a switch is pulled on the floor area. Through the door is a drop off into a pool, and a tunnel ending in two parallel switches that opens a trapdoor in the ceiling in the tunnel. Up is an area with a pool, and an inactive Shiva Statue. The door near the ornamental statue opens when a switch is pulled (which can be reached from scaling invisible boxes over the pool. Inside this door is a long rectangular room, with a spike trap at the end. The spike trap starts when Lara pulls the switch, and she must run to the other side to claim the Key of Ganesha and then run back through the door before the spike trap blocks it (it closed when you entered the room, and re-opens when you claim the key). Outside, the pool has now turned to mud, and you must follow the passage and return to the first alive Shiva Statue room.Left Gate
Through the left gate you have to pass through a tunnel (with a dart trap) and then scale up and around a small valley, until getting to an area with a pit. Over the pit, several boxes need to be reconfigured in order to reach a switch, which floods a pool near where you came through the left gate (which has a water switch). You must then retrace you steps until reaching back at this shallow pool, and to pull the switch, and access the second Key of Ganesha (or first, depending which order you took the gates). Then return through the passage you came in (the left gate to return to the first alive shiva room.
Level Climax
When both keys are inserted, the doors open, and you have limited time to climb the ladder to the ledge before the spiked ceiling descends. In the room above is two monkeys and another block room with a central structure. One block can be moved so Lara can maneuver to pull two switches to open the door below. Beyond is a room with two alive Shiva Statues. The first one activates when you enter the room, and the second comes to life when you touch the ledge with a third, inactive Shiva Statue. In fact, this Shiva Statue, if you have paid particular attention to how the statues look, it is missing two swords, and this statue is a item receptacle. Each Shiva Statue will drop a scimitar when defeated. Place the Scimitars on the inactive statue to open the door to the final chamber.In the next chamber, Randy and Rory are seen horribly hovering in mid-air.
Another Shiva Statue present comes to life when you approach the third Key of Ganesha from below Randy (or Rory) on the high pedestal. To exit this area, and finish the level, you must find two other Keys of Ganesha. One is inside a room with another falling spiked ceiling. You must quickly pull two switches in this room before the ceiling descends, and then fall into the trapdoor which opened. Below is one Key of Ganesha. Claiming it opens the door in front of you and an access back to the main chamber.
The fifth, and final Key of Ganesha of this level is found in an underwater room in the blue adjacent room to the one with the floating Randy and Rory. However, a current stops you from claiming it, and it pulls you towards an underwater spiked wall. You must carefully maneuver yourself away from the wall and pull the two switches to remove the current. Now you can claim the key.
After placing all three keys into the three receptacles in that area, a door nearby opens, which leads to the level exit, and the next cutscene.
Shooting Tony
The next cutscene is activated upon entering the area past the opened door. Lara is seen sliding down a slope, exiting the temple.
As she reaches the bottom, she balances herself so she doesn't fall over the edge and into the river. She familiars herself with the environment, but suddenly takes a step back as she spots Tony standing on a raft in the middle of the River Ganges (So he hasn't abandoned the Jungle?). At first, he doesn't notice her; he seems to be more interested in the scrutiny of some aquamarine block embedded into his chest. Lara, knowing that this must be the Infada Artifact as the block hasn't killed him, realizes that Tony must of been one step ahead of her, despite what he had said about leaving the Jungle, and had already killed Randy and Rory, one of which had a wound as if something had been stabbed into it.Lara draws her Pistols and begins shooting at Tony on the raft. Tony, now obviously aware of her, just laughs at her retaliation and uses the powers of the Infada Artifact inside his chest to cause the entire temple to collapse. Lara quickly dodges the cylindrical columns of the Temple as they fall around her, finally dodging one last block when she thought it was over. When the camera regains Tony, he is laughing maniacally as he is lost from site around a corner. Lara, ready to battle, starts of running towards where Tony disappeared, but backtracks when she sees a green Quad Bike placed by a waterfall, most probably left by Tony. She runs to it, and that's where the cutscene ends, along with the level.
The River Ganges
This level focuses on using the Quad Bike to span certain gaps that would be impossible to cross with Lara alone. Most of the level is about doing this particular method. If you're finding the Quad Bike controls difficult to master, especially if you are used to the different Tomb Raider II controls if you played that game before this one, you should most definitely practice on the Quad Bike at Lara's house.
By using the Handbrake Acceleration control (hold down the handbrake (the "?" Key) while motionless then press the forward directional button for a few seconds before letting go) you should be able to pass over most gaps. Also, whilst in the vehicle, you can run over the still violent monkeys, who seem to stay still and not attack while you're on the Quad Bike. One last important note is that the Quad Bike will explode if you ride off a particularly high cliff to an area below, and it will also explode if you fall into the river, killing Lara instantly. In this level, you will get off the Quad Bike often.
If you fall into the main course of the river, you will not be able to surface, and you'll either drown or get devoured by the Piranhas in the water. If you survive the path of the long river to the end, it is a dead end, and also a piranha infestation.
You will not be able to see Tony when you regain control of Lara after the cutscene. Using the Quad Bike you first must scale the many gaps across the river or several gorges. As said before, this is what the level is mainly about about (an important note is that some gaps or gorges may have a ladder leading down to a Secret, so it's worth checking the sides of the put for a climbable surface).
Later on in the level, you will experience a very narrow path around a cliff along with a tight corner (or two) that must be carefully driven round, followed by a vulture valley.
Vultures are easy enemies that can be seen from a distance, but usually come in packs of two or three. Their shadows are a clear giveaway, along with their incisive and annoying calls. They attack with their claws and beak, but do not cause much health damage.
Towards the end of the level, you will leave the Quad Bike for the last time above a waterfall. At the bottom, you can see the raft Tony was on crashed and broken on the bank of the river. He rode the course of the Ganges and fell of the edge of this waterfall, crashing into the river plunge-pool below. The powers of the Infada Stone may of saved him.
Behind the banks and waterfalls where Tony's raft was is a hidden tunnel, leading to the darkened Caves of Kaliya.
Alternatively, at an early point of the level you can either choose the above pass or take a different route through some ruins. It re-connects to the other, river, route nearer the end, just before the waterfall with Tony's crashed raft is.
Caves of Kaliya
The Caves of Kaliya level is a generally very frustrating, cave maze The maze section of this short level is divided into three separate levels; a higher, middle and lower. The middle level can be completely ignored if intended, but more pick-ups are found when going through this part. Caves of Kaliya can be very annoying if you constantly find yourself in dead ends that look too familiar, or areas you're sure you've been to before. A good walkthrough, such as the tombraidergirl [1] ones, are required if you find this level particularly hard, or for an unconfident first time, and make sure you only save when you are sure you have reached another section level of the Caves of Kaliya, in case you get hopelessly lost in some of the tunnels (although the PS Players can restart the level). You can tell if you have reached another level by a large drop off leading to an area below.
The maze contains not only Lara-height passages, but also many crawl-spaces.
Throughout the maze you will find numerous Cobras (the amount will depend on the route you take), but at the very end, you will experience a small cave full of ten cobras. The cave entrance hole may be illuminated strangely when first approached, but this is just because of the crystal which is hovering above. Carefully hang and drop into the below cave after lighting a flare, and if you're lucky, all four currently alert Cobras should be just be standing still watching Lara upon her fall. Select one Cobra to shoot and back away from it (don't worry, any other Cobra will not attack as long as you walk!). Shoot it, and it shouldn't be able to reach you, and soon enough it will crumple. Do this for the remaining three Cobras, before discovering the other six cobras by approaching the area with the lit passageway. A boulder will fall at this point, so either move out of its way or jump backwards over it to avoid it.
After more easily disposing of the remaining six cobras, you can safely crawl through the opening at the end of the passageway until you can stand. Below is a long slope leading to another seemingly partially water filled chamber. However, this will be the fighting arena for fighting the Indian boss, Tony, and the claiming area of the legendary Infada Stone.
Killing Tony
Tony has made his way to a great antechamber below the surface area. Now Lara must fight and kill him in order to claim the Infada Stone from his defeat.
After collecting a save crystal, slide down the slope, pistols drawn. NB: I do not advise using the Shotgun as it has a low effect on Tony from the safe distance you should be from him, and you'll just waste ammo. Besides, the Pistols are actually stronger in this circumstance.
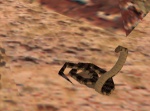
As soon as he's in view when you're sliding down the slope, start shooting at him. When you reach the bottom, he'll start levitating himself using the powers of the Infada Stone. Sidestep twice to either the left or right so you have room to slide flip in the next move (still shoot while doing this). In a blast of the Infada Stone's meteoric energy (Image 2) which sweeps the room, Tony will covert the the before deep water between the four islands in the chamber into a deadly fire induced liquid, also making it much shallower. Do not fall into the toxin, or Lara will instantly die.
Tony will then start using the power of the Infada Stone to throw fireballs at you (Image 1). Wait until he is on the verge of firing one blast, before side-jumping either to the left or right depending on the initial direction you side-stepped to. Obviously, still shoot. The fireball should miss Lara. Repeat the process. (Note: Tony switches from launching the fire balls at Lara to throwing them at a certain plate in the ceiling where they bounce down to hit Lara)
He will fall surprisingly quickly, and his body will disintegrate into nothing after a second Infada energy blast. The Infada Artifact will be left on his central island after his demise.
Alternatively, instead of staying on one island, you can quickly move around the other three while shooting, though this may take slightly longer (however, minimizing the chance of being hit by the fireballs). This method's main drawback is when quickly maneuvering around these islands, you may fall into the fire induced water due to the annoying camera angle when your weapons are locked on Tony.
Before picking up the Infada Artifact (which will end the level), you may want to pick up the other three pick-ups elsewhere in the room (you would of noticed these if you jumped from island to island, but you couldn't stop and pick them up because Tony would fry Lara). They are a Small Medi Pack, some Grenades, and the Grenade Launcher left behind by Tony before Lara arrived in this chamber.
Now you can pick up the Infada Stone to end the level with a FMV Cut-Scene.
| Level No. | India Level | Number of Enemies (Maximum) | Types of Enemies | Number of Secrets | Types of Traps and Obstacles | Significant Finds |
|---|---|---|---|---|---|---|
| 01 | Jungle | 9* | Monkeys, Tigers, Piranhas (cannot be called) | 6 | Swamp, Rolling Boulders, Spikes and Spiked Walls | Indra Key, Shotgun |
| 02 | Temple Ruins | 31 | Monkeys, Shiva Statues, Piranhas (cannot be killed), Cobras | 4 | Swamp, Mechanical Blades, Poison Darts, Boulders, Spiked Walls, | 5 Key's of Ganesha |
| 03 | The River Ganges | 34 | Vultures, Monkeys, Piranhas (cannot be killed), Cobras | 5 | Quad Bike jumps, Current Affected Water | Quad Bike, two Gate Keys (found in an alternative route) |
| 04 | Caves of Kaliya | 15 | Cobras, Tony (Boss) | 0 | Maze, Deadly Fire affected Water | the Infada Stone, Grenade Launcher |
|
* (Not including the Monkeys) |
Dr Willard
This high detailed FMV Cutscene begins with Lara emerging back into the River Ganges area, with the Caves of Kaliya behind her. Momentarily looking around her surroundings, she suddenly hears someone from her left shout ""Hey!"". A riverboat comes into view with a clear person on board near the front. Lara is looking skeptical and curious as the boat pulls up beside her. One of the men aboard (there is only two of them, the other is the driver), wearing an explorer outfit, begins conversation with Lara.
"I don’t want to be misrepresented by that retarded researcher you just been with, er..." he tells her, prompting at the end for a name as Lara clambers onto the boat.
"Lara" says Lara simply. "I’m Doctor Willard." he says, turning around and walking towards a sheltered part of the boat. Lara follows him curiously. "I’d come to converse with Tony myself, but I saw you were doing a rather more creditable job, I think. Indeed, I’m inspired! I’d like to offer you other work."
He seats himself into a chair and gestures Lara into one opposite him. Lara, incredulous about Willard's proposal, says "What?! Shoot the breeze with some of your other boys? No thanks!"
Willard, trying to reassure her that they'll be no more Tony incidents, replies by saying "Fortunately, they were the only lab rats we let loose into the field. No. My request is for three other artefacts like this."
Lara, confused, holds out the Infada Stone in her hands."The Infada Tribe only had one artefact of this type. It’s unique. Anyway, what would your interest in it be?" At that time, Lara only knew that the Infada Stone was rumoured to contain great power, and did not know of it's true and diverse history. As said in the game guide book, Soon she will discover much more...
"I'll show you" says Willard. He picks up the stone from Lara and places it onto a work table next to him."It’s not from India. Rather an island near Antarctica. It is in fact meteorite rock that has been fashioned and used by Polynesians who once settled there many, many years ago. See that, that’s unique, and unknown material." he says as he opens a laptop briefcase, and uses a scanning tool on the Infada Stone. A small graphic diagram is seen on the screen, which doesn't seem to mean anything in particular to us, but the laptop then bleeps to indicate that this material registers as the type Willard is looking for.
"So how did it end up here?" asks Lara, who had stood up and was interestedly looking at the screen.
"Formed from the planets, sculpted by Polynesians, distributed by goons," says Willard eagerly, "Our excavations and investigations have led us to this:" He indicates a small, brown book on the desktop and Lara picks it up as Willard says "A sailor’s diary from Charles Darwin expedition on the HMS Beagle."
Lara, reading the diary in her head begins one of the accounts: "August 14th, 1834...". Her voice changes to that of Stephen Barr, the previous owner of the diary. We see a ship, certainly the HMS Beagle, for a brief moment before a close up of Stephen on a small desk on the deck. He thinks "This voyage is getting too boring for me to go on with this journey. My adventures at sea are a embarrassment. The only tales I’ll have to tell are hours of bird watching, picking and pressing flowers, following the blessformus ideas of the governor, Darwin." Stephen is seen viewing a distant, icy islands over the side of the ship (just before he gets badly sprayed by sea water. "But this doesn’t even concern me know. I just want food, something more than vegetable broth in me. Today we five have made a pact." We see a group of five men in a small boat row away from the vessel, to the aforementioned icy island. "The only sampling we’ll be doing is for meat, pure, solid, blood rich meat."
We see all five sailors make there way across the barren and icy land following the tracks of an animal, specifically a wolf, which they had discovered. One man sees that they lead into a cave. Bravely, they all enter, carrying lanterns. Icicles dominate most of the ceiling.
"The snow’s run out, the tracks have gone!" says the man in front. "Just keep going, we’re on it’s trail." says another.
Stephen, looking apprehensive, is seen with a drawn pistol and uses his lantern to view some carved texture in the wall. They follow the cave passage to an opening with an icy walkway ahead. Slowly, they all walked along the path to a large, central icy platform.
"There’s something here!" says one man, kneeling in the ice. He whistles enthusiastically and pulls out the Ora Dagger from it."Look, there’s another one. What’ya reckon they’re worth?" says another sailor, while Stephen explores other sections of this cave with his lantern. He views a tall, man made statue. Suddenly, he hears a scuffle, and he quickly looks in the direction it came from. We see nothing but paw-prints, but the way the camera is moving symbolizes that those tracks weren't there a second ago... Stephen follows these new tracks, and reaches were Paul Caulfield is standing.
"Too late, there’s only four, none for you!" he says teasingly, momentarily holding up his artefact; the Infada Stone.
Stephen sees a dark shadow standing upon the rock behind Paul.
"Paul..." says Stephen warily.
"Wha-" begins Paul, but is attacked from the side by a wolf, pushing him to the ground. The wolf bites into his neck, and Paul scream echoes across the cavern. Stephen uses his drawn pistol to shoot the wolf, who isn't immediately killed, but runs off. Stephen examines Paul's groaning body; he is seriously injured and losing a lot of blood.
Stephen attempts to carry him out, despite the impatient and distressed calls for him to leave without him, as the cavern starts to collapse. The wolf tries to escape the falling debris but is punctured on an icicle, while Stephen and the almost dead body of Paul crash below into a sliding ice tunnel which eventually deposits them back outside. Paul is now completely dead, blood spurted on his face.The location once more changes to that of a wooden gravestone bearing Paul's name. Stephen is hastily giving the others and important note; "Nobody better say nothing about this to the governor, else will be back having to walk down that to the creature for it’s samples. Paul fell down a crevice, Ok?"
"Ok, Stephen" says one man.
"Amen" says another.
The scene changes back to Willard and Lara in India.
"Stephen was to be the only survivor of the four." begins Willard, starting to pack away some of the equipment he had used to examine the Infada Stone, "When he arrived back in London, he superstitiously sold off his artefact, having seen his pals murdered and killed with theirs. One here in India, one in the South Pacific, and one in Nevada. The places where I’d like you to go."
Lara closes the diary and hands it back to Willard. "Sounds good to me." she says, smiling.The boat continues on down the river as the cutscene ends.
Area Selection
Area Selection Screen
As soon as the FMV Cutscene ends, you are presented with the level statistics information box, in this case the Caves of Kaliya level, as usual. The India image/loading screen is seen behind it, indicating that you have successfully completed the India section. After deselecting this levels’ statistics box the Area Selection Screen will appear in the form of a distinguishable globe. You current location will display as a flashing dot in the obvious location of India, and the globe will initially start at the South Pacific section option. This globe is the Tomb Raider III mechanism of choosing the three non-linear sections of the game; London, Nevada or the South Pacific areas. This globe will re-appear at the end of every successfully completed section, prompting you to select the next area you wish to do. At the end of the third and final non-linear section the globe will appear one last time, but this time it will rotate slightly so the Antarctica option is visible and accessible.
Your Choice
It is completely up to you how you order these three non-linear adventures, though obviously you must complete all three in order to access the game’s climax levels in Antarctica. However, this article can recommend and detail information of each section in terms of difficulty and game advantages along with equal disadvantages.
Choose Wisely
Use the left and right directional buttons on the keypad or game console (PC or PS respectively) to move the globe to the next available location. As said before, the globe appears first at the South Pacific location, so press right to view Nevada, or left to see London. Press the Action button to select your choice, though while selecting, do remember the following recommendations and information about each section or you may suffer in the long run (NB: The information given here is not in full detail as it would contain too many spoilers. Further information can be found later in the article).
- In each of the previous two Tomb Raider’s, Lara had lost her weapons at some point of the game. There is no exception in Tomb Raider III. She will lose her weapons in Nevada, more specifically in the level High Security Compound. She will also lose all her ammo, something never done before. Because she loses her weapons inevitably here in Nevada, this section should most definitely be done first. Although it would be very annoying to lose the amount of ammo you may of obtained in the India levels, if you leave this section to last, you’ll just have more and more ammo to lose, and you’ll never get it back.
- In terms of difficulty, London is the most intricate to complete (of these sections!). Some of the levels there are extremely difficult to complete without any walkthrough guidance. The South Pacific islands section is perhaps the most easy to finish. Most levels there can be completed very quickly and without walkthrough guidance at all.
- Although once you complete Nevada, you can then decide which of London or the South Pacific you want to precede to, I would recommend London so you can get the hardest section over and done with, although, as said, it does not matter which order you take as long as Nevada is completed.
Once you have chosen your selection whether based on your own personal judgement or the information suggested here, select the location using the Action Button. The globe will disappear and the new loading screen/location image will appear depending on your selected location.
Jump to Location
As the game is now non-linear, so should this article. Select either Nevada, London or the South Pacific from the boxes below to jump to the information about that particular section, and continue with the article from there. This will re-appear at the end of the article section relocating you to the next, or to Antarctica, depending on the order you have taken and your final destination.
Area Selection
| The Nevada section is about uncovering the mysterious Element 115 artefact from inside Area 51. The Nevada section actually highlights the more space and alien side of the meteoric artifacts. |
| The London section, the most difficult focuses on finding the Eye of Isis which Stephen Barr brought to England. Lara travels from the rooftops of London, to an abandoned tube station, and then to the underwater passages beneath the immense building belonging to Sophia Leigh, the owner of the artefact. |
| Among the scattered islands of French Polynesia is a cannibalistic tribe descended from the Antarctica Polynesians who fled. Their ruler, the Puna, owns one of the meteoric artifacts, and Lara must make her way through the tribe settlement, then a dinosaur infested crash site, followed by the gigantic Maduba Gorge, before descending into the Temple of Puna. |
Nevada
Overview
Lara reaches Nevada from the previous location you visited through unknown transportation. There are three Nevada levels set in three different areas. The first level is set in the Mojave Desert despite it being called Nevada Desert. The Mojave Desert covers the majority of the southern section of Nevada and is populated to various creatures such as rattlesnakes and vultures, which Lara will inevitably encounter. As said before in the Area Selection paragraph, Lara will lose all her weapons and all her ammo, only leaving her one small medi pack (or the Save Crystals on the PS Version) and any meteoric artefact she has found so far. Because of this, if you have selected this section of the game directly after completing the India levels, you have made a very wise decision. If this is your last section, not so wise at all. Lara will lose her weapons as the very end of the Nevada Desert level, and for the majority of the next level, where she has been imprisoned for attempting to break into the compound, will focus on re-claiming her weapons and perhaps some new ones. In the course of this level, Lara will encounter the friendly, though aggressive looking, prisoners. They will kill the guards for you, and sometimes this is very necessary, as commonly the guards, called MP's (Military Police officers), will drop items or keys when they die. From the compound, Lara sneaks into a truck destined for Area 51, and so arrives. Area 51, of course, is one of the worlds most secretive locations rumoured to contain vast evidence of extra-terrestrial existence. The base lies inside the United States Air Force's large Nevada Test and Training Range. Area 51 can be also called Groom Lake, Home Base, Dreamland, Paradise Ranch, and is officially named as the "Air Force Flight Center (Detachment 3)" has been a a flight testing site since 1955. Here in a Tomb Raider version of what it looks like, Lara must make her way through the upper, surface areas before descending into lower levels and through rooms expected to be in Area 51, such as a missile construction room, launch pad, and a huge UFO containment room. Nearer the end, Lara uses a device called a Code Disk (there are two in the level, the other one launches a missile) to lower a trapdoor beneath the UFO, and enter inside. Its interior is freakily bigger than the outside, and the walls are lined with a weird flesh like material. In the central chamber of this UFO is where the Element 115 meteoric artefact is kept (named by the US Government). It has been placed upon a central platform, and picking it up will end the level and the Nevada section.Further, more detailed, information is located further in the article in the respective places.
Nevada Information
Nevada is the 36th state of the United States, also called the "Silver State".[2] The capital city of the state is Carson City, though the largest city is Las Vagas, a location in which Lara recently travelled to (Nightmare in Vegas - Tomb Raider II Gold Bonus Level). 86% of the land is owned by the US Government (whose military officers are the main enemies in this section). Nevada is the seventh largest state in the US, and is home to around two and a half million people, with the majority leave near or around the Las Vegas area. In the state are 16 smaller counties and one independent city[3]
Section Features
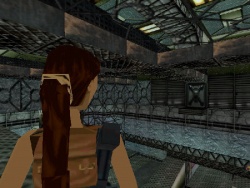
- Lara is seen wearing a new outfit in the Nevada section of the game (right). It consists of blue camouflage trousers, a short black top, her usual black gloves, and new, red-laced boots. This outfit is also used in the Shakespeare Cliff and so levels in Tomb Raider III Lost Artefact. This outfit is suitable for the intense heat of the Nevada Desert, where it usually exceeds 38 degrees centigrade (100 Fahrenheit).
- Music here in Nevada rarely differs form any other point of the game, except for the background music. There is no significant or distinguishing musical tracks that defines the section, except occasional military based marching music.
- Finally, there is no boss for this section, and so Nevada is the only area not to have a final boss.
Nevada Desert
In terms of difficulty, the "Nevada Desert" level is reasonably easy to complete, with light combat and not too intricate puzzles. There are actually only three types of enemies; Vultures, Rattlesnakes,and workers. In fact, the workers are easier to kill than the vultures, so this may give you a very clear perspective on the easiness of combat here. The poisonous enemy here in Nevada are the dozens of Rattlesnakes found, who are seen a still, curled up creatures, similar to the Indian Cobras, who suddenly awake and attack when Lara approaches them. Often, a pick up is very near their bodies, and so they must be killed in order for the object to be acquired safely. The background music is a familiar one to those who have completed the South Pacific section, in the level Crash Site; A humming insect influenced and cricket noise.|
NB: Weapon and Ammo Note - |
The Detonator Switch
Lara begins the level Nevada Desert sliding down a cliff side slope and into a rocky valley below where a rock arch can be clearly seen up ahead. This large area has two vultures and two rattlesnakes, and the formers appear at the very left point of the rock arch when you move ahead from the starting position. At the back of this valley is a small rocky path leading up to an area with a strange metal structure, which you cannot climb on from you current position. Move around to the edge of this area and witness a aircraft, specifically a B-2 Stealth Bomber doing practice, fly over Lara's head (they don't cause any damage). Although you cannot see it, there is a small hole in this structure leading down below, and the objective is to traverse the ledges above the valley where you started the level, then across the rock arch, then finally through the hole. If you haven't seen the plane yet, and are about to begin the aforementioned path to get to to the hole, make sure you wait for it to pass or Lara can be get knocked away from her intended target by it. At the bottom of the hole is a water filled tunnel that takes you to another canyon area. The main objective of this section is to reach the area behind those two waterfalls to the left when you enter the area. To do that you must scale several ledges around this canyon, fighting several nasty vultures on your way. It doesn't matter if you fall in the water, as there is an easy way up and several pick-ups on the floor.Just before entering the area behind the waterfall, you will find a cave with a Detonator Plunger with a wire leading down to a box of TNT. This may be familiar with those who know the Tomb Raider II level Bartoli's Hideout. Like that time, a Detonator Switch is required for the TNT to explode, providing an access to another area.
When you do enter the area behind the waterfall (after experiencing two aircrafts fly over Lara's head) , you uncover a gigantic cave-like area with a huge waterwheel. You'll meet an unfriendly worker behind it when you go and investigate. You probably already know this, but Workers attack using their fists, although they don't cause much damage. They are very easy to kill, it will only take a couple of pistol shots (or one Desert Eagle shot, 20 Uzi bullets, one direct, close up hit with the shotgun, one rocket (duh!) etc). Strangely, they make no noise when they do die, unlike all other enemies who make gargles or groans when they snuff it. Using a ladder on one side of the waterwheel structure, you can climb to the top to discover an empty, metallic channel. At the end is a reservoir area with a large dam on the left. An underwater lever in the reservoir will open a tunnel directly to the inside of this dam (although, you have to pull two more levers to fully access it, the first one opens the grating to surface and the other opens a door in a passageway inside the dam). The switch inside the dam raises an elevator back in the waterwheel chamber, and opens a watergate down below, allowing water to travel along that metallic channel and to the waterwheel. More importantly, as and as the ensuing cinematic shows when you pulled the switch, it also raises an elevator back in the waterwheel area.Getting to the Elevator
You don't have to follow the underwater passage, and it would be dangerous to try, as when the switch was pulled, and the watergate opened, a current activates as the water is being pulled along to the waterwheel. If the current pulls you out, you will descend all the way to the bottom of the canyon area. Slide down the opening in the dam, jumping and angling to the left in order to land on the side of the reservoir instead of inside it.There are two ways to get to the elevator. One is just to go back the way you came, careful not to fall in the water. Go down the ladders and go (assuming you have the water wheel in front of you) to the right and around the perimeter of the cave to find an alcove with the elevator at the end.
The other way is to use several edges to the right of where you cam in to this area. These ledges lead to the area near the water wheel. A Rocket and two medi packs can be found doing this path.
You'll find a worker here, and the Detonator Switch inside the elevator.
Now you must make your way back to that detonator plunger in that TNT cave some time back. Exit the alcove with the elevator and take a series of jumps over those edges you used to get to this area. Then jump over to the cave one one side of the ledge.
Use the Detonator Switch to explode that TNT down below, causing the cave to blast open (although you do not see it) and quickly jump out of the way of a rolling boulder that just started to roll. Head down and climb and traverse the new ledges until pulling up into a whole new area, with a fenced compound to the left (not the High Security one).
The Compounds
Do not touch the electric fence, for obvious reasons. A common feature in the Nevada section is electrified material deadly to contact. Inside the fence you'll see a couple of Workers walking about, but they don't notice you. Around the perimeter of the fence, ignoring the sloped rock to the right leading to another area, is a crawl-space leading up to a pool with two underwater levers; one unlocks a door somewhere, and the other, although you don't know it, opens a door at the top of a water tower. Now backtrack to the that sloped rock you previously ignored and uncover another fence and a sign that reads "Photography of this area is prohibited" which is perfectly understandable, this part of Nevada containing Area 51 and all. Behind the fence is the level exit, and to get to it (by crashing) you need a Quad Bike to pass the gap between the big ramp you can see and the (electric) fence. Anyway, you'll find that door you unlocked in this vicinity near two rattlesnakes (Note: For fun reasons, I keep these rattlesnakes alive until you get the Quad Bike here, then you can run them over). The switch inside fills the water tower with water, and this water tower can be found in another path leading off just past the crawl-space gap. There are two workers here, and after dealing with them, you can climb up to the water tower and take a running jump over the fence (for information, the open gap here is the one opened with one of those two underwater levers a while back) and into the Quad Bike compound.The Quad Bike is found in a small hangar on the other side of where you land. If you want, you can ignore any of the prisoners you meet as you head over there, and run them all over plus two more in the hangar. Using the Quad Bike, you must get the Generator Access (Card) from the top of one of the buildings, using one of the ramps to get up there (NB: If you purposely leave the Quad Bike up there and jump off the building, you can jump onto some gratings which raised when you headed up there to get it back). Also, ignore the switch by the metal grate for later, or you'll get electrocuted.
Use the Generator Access Card inside the building with computers, newspaper clippings from the Observer and the Billiards Table. A worker appears when you insert the card. The switch there deactivates the electricity, allowing you to use that switch and get your Quad Bike out of this compound. Now drive down that rocky slope, run over those two rattlesnakes if you want, and take the Quad Bike up the ramp and over the fence, to end the level with a painful cutscene.
Imprisonment
Sadly, it's time to lose your weapons. Lara attempts to break into the High Security Compound, as we know, by flooring the Quad Bike up the ramp and over the electric fence. In the cutscene which follows straight after you drive over, it momentarily seems as if you're gonna make it, but as the music indicates, and what you then see, it's not going to be alright. The back of the Quad Bike hits the edge of the fence, causing the Quad Bike to twist violently and Lara flies off, hitting the ground with a painful bump. The Quad Bike continues to twist as well as Lara, who screams as she hits, full on in the face, the ground, and into the wall. The Quad Bike crashes to a halt next to her. She has been knocked out cold.
Two MP (Military Police officers in case you don't know) guards (with clubs) of the High Security Compound who witnessed Lara attempt this break-in approach her unconscious body.
"You crazy gear freak! What kind of a stunt is that to pull?" says one MP. He quickly examines her and finds she is knocked out, and so picks her up by the waist and arms. "Let’s take her in".
"She don’t look much like one of them, maybe she’s a peco-terrorist or something?" says the other interestedly. He grabs hold of Lara's arm and pulls it over his shoulder, as the other MP does the same
"And they were hot pants, huh?" the first MP says sarcastically.
Leaving the Quad Bike where it crashed, we see both MP's carry Lara across the shallow river and into the High Security Compound.
High Security Compound
It's happened again; Lara has lost her weapons, and has to get them back, but that's not simple. Unlike Offshore Rig in Tomb Raider II, where Lara has the opportunity to reclaim her weapons very early on in the level, for the majority of this level, Lara will be weaponless and she'll only get them back almost at the end. You can't end the level without the pistols, as you need them to kill one guard who drops a Blue Security Pass, very essential in completing the level. The Desert Eagle can be found (or re-found) along with the Pistols, and the Grenade Launcher is found as the second secret. You'll get some more weapons in the next level, so don't worry. The construction of the compound is set in different "Bay" areas, such as Bay C, or E.
In terms of difficulty, High Security Compound is actually not to hard. Instead of usual puzzles and combat, this level focuses on sneaking past guards so as not to get hurt or get an item safely. Out of all the levels in the game, High Security Compound is the one that uses the most stealth, and there are several factors that you need to consider when sneaking past them for this level, and the next. They are:
- If, in some cases, a guard has his back to you, do not go anywhere near him at a distance of about a square or two as he will hear you. Stay well away if possible.
- If you are in a crawl-space and a guard is patrolling just outside (you can see his legs) wait to he heads in the direction with the most time and do not leave the crawl-space until you can no longer see his legs. You can tell if he's spotted you by a grunt of surprise. If he's armed, he will try to shoot you.
- You can tell if a guard knows that you are there if you can hear their footsteps quicken, meaning their running.
If you know Tomb Raider II, you'll know that the background music, a dripping, generator like music, is from the Wreck of the Maria Doria levels.
You will encounter many friendly american prisoners in the level who will take care of the guards where possible. Like the workers, they punch with their fists and are capable of killing guards with one hit. There is no need to kill them when you get your weapons back, although, at the point when you do get them back, there is only one prisoner you can kill as all the others are in an unreachable previous area.
Bay C
Anyway, you will begin this level in a jail cell, conscious, and weaponless. All your ammo is completely gone except for one small medi pack, the save crystals for the PS Version players, and any meteoric artefact you have found so far. In this small cell is the prisoner necessities; a bed, a sink and a toilet. You will also hear a door close, symbolizing that she was just put inside. A guard is watching from outside although you cannot see him. To escape from your cell, you need to jump onto the windowsill with the green (harmless lasers). This acts as a trigger to open the door in case the occupant attempted to escape, and a guard with a club will come running in. As you have no weapons, you got to find a way to kill him, and that's through the use of a prisoner (or four). However, before you go and open the door yet, there is a a very easy way you can open a door with a prisoner and without getting hurt at all from the guards; From the starting position, back-flip onto the windowsill and open the door. Immediately jump forward as the guard comes in, and sprint out and to the left along the catwalk. The guard will momentarily hesitate before turning around and following you, and this gives you some time. Sprint past the first button and push the second, releasing one prisoner. The guard would of caught up with you by now, so turn right and down the stairs and let the prisoner take of the guard. When you hear a loud shriek you know the guard is dead.
For information, this area is called Bay C because of the metallic labels on the wall reading that.In the holding area, you can push the other buttons to release more prisoners for later occasions. On the bottom floor you'll see a metal grate with a control room behind it; you'll come to that in a second.
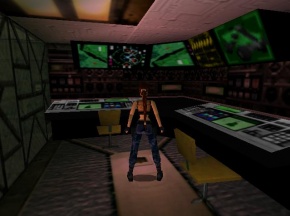
In one of the cells is a movable crate labelled "M9-12". You must re-arrange them in order to reach the roof of the jail, and from there (using a switch) to to get to a walkway above that control room you saw. The grey pad in the floor is a trapdoor, and also note that there is a guard below pacing the corridor. You must jump over it at just the right time in order for the guard to not see you. You can tell if he's seen you either by he's surprised grunt or quickening footsteps. This can make the next section more difficult, not just for you, but for the prisoners. So, jump over this one at the right time and fall through the trapdoor at the end. Quickly enter the control room and pull the switch to open those metal grates to the jail, so the prisoners can take care of the guard (who weirdly does not notice them even when they're right in front of him if everything went well before). The control room contains a beeping radar device and several diagram computer screens. The guard will drop the Key Card Type A which goes into the nearby slot.
Bay D
At the end of this accessed area is the bathroom facilities for the prisoners. Here and in another room, a box must be moved so as to reach the lower one of the two holes in the ceiling, pull the switch up there to flood the bathroom, and then use the water to access the other hole. Below the gap in the floor are some deadly fire emitters on the stove (below is the kitchen), which need to be turned off by a switch in another area by the hole to the stoves (this switch is located past two barb-wire holes).
In the Kitchen area, some gratings cover the fans up on the ventilation system on the wall. You have to raise those grating in order to continue. The switch is located in a small control room just off this Kitchen (past the door with a button). The door on the left is the control room, and the right leads to the mess hall where the prisoners eat and drink. However, there is a guard inside the control room which you must take care of before you push the button, so first open the door to the mess hall, then the control room. Lead the guard through the opening to the right, and then to the left and you'll find yourself back near the prison cells, and now the prisoners can finish him off.
Backtrack to the button, and push it to raise the grates, and carefully walk past the fans and through the crawl-space tunnel to the right (after a drop-off and a shimmy to the left).
Bay E
The crawl-space leads to a ladder. At the top a prisoner will use a hand pad to lower a grating above you, allowing you to climb up there. The prisoner is stuck where he is, so just ignore him and climb up the grating to a green gradient slope. If you quickly race up, you'll see a MP walk slowly into a small corridor to the left. Grab his attention, and sprint into the metallic yard opposite where the guard is standing. Head to the left, and down all the ledges. Push the button to release a prisoner.
Note: You may encounter a very annoying, game flaw which is that the prisoner climbs up a ledge just as the guard climbs down, and vice versa. They continue to circle each other, and to solve this without reloading you need to use yourself as bait. Place Lara in the middle of their circle and wait for the guard to hesitate. This brief hesitation will allow the prisoner to catch up and kill him.
Past the gun turrets is a ladder leading down to a huge yard with a distant guard patrolling. Set free the prisoners from the cells on the left, and, if you want, open the door at the back so the previous prisoner can also help. This guard will drop the Yellow Security Pass on his defeat, which is inserted into the yellow panel by the hangar. Inside, you can see a parked stealth bomber through the glass windows. As you head down the small, green, corridor, a camera view will show an armed MP pacing the ground below, at the bottom of the slope. For this reason, do not go anywhere near the slope, and instead crawl through the clear opening.
Strangely, when you find a glass window overlooking the guard, he does not notice you at all. Drop off at the other end when the guard is heading towards the opposite wall and immediately crawl towards the switch (the camera will keep track of the guard). Pull the switch at just the right time so a red laser beam is activated and slices the guard. It also raises a gate leading all the way to a huge satellite dish tower (this laser beam is also deadly to Lara).
There is a small hallway leading to another control room at the opposite side of this tower when you reach it. Below you can see another level of the tower some way down. You'll come to that later, but for now, enter that control room mentioned before by jumping to the hallway.
Inside the control room is a button which moves the huge satellite dish on the top of the tower, revealing a small hole through the tower. The tower area can be re-accessed with the door inside the control room, which leads to the long path back to the tower. After a simple journey you would of reached this now exposed hole and staring down its gigantic drop to a vague water source far, far below.
You fall through the whole tower when you drop into this hole, and land into a pool. This pool is seriously affected by strong currents from four underwater outlets, and also a strong current from a small hole in the bottom of the hole. This hole leads to a long underwater tunnel, but the current, caused by an underwater fan, will stop you. The current can be hard to maneuver around, and the best way to do it is to fall through the centre of the hole, and as soon as you hit water quickly roll and swim upwards before you get sucked in by the current. The surface part has no current, so you can surface safely and pull up to the low edge. If you find yourself being dragged away by the current, do the following; swim away from the outlet in a horizontal direction, not diagonal, as that will not work as effectively. Once you pull free over the central structure, pull up before the current in the long underwater passage sucks you down (and you cannot escape this current). Also, down in the pool, you will see an underwater passageway leading off, and you will come to that later.Traverse the ledges around this pool until you reach the PCB lined crawl-space. This leads to a long hallway with a switch that opens a door in another hallway directly by it, but the grating there stops you from getting to it that way. Head back to the pool and now through the underwater passage. A darkened crawl-space lies at the end, and you can see the pacing feet of a MP with a pistol just beyond it. Wait until he goes to the left (and when you can no longer see his feet) before crawling out and sprinting through to the right before he sees you and makes the next section almost impossible. Climb the first ladder and follow the hallway to reach that lower ledge of the satellite dish tower. At the other end is another ladder leading to a very stealthy moment of the level. A guard has his back to you to the left, and to the right in a crawl-space lies where a second Yellow Security Pass is found. Beyond him you can see a door with a key card slot, and this is the second secret, but you need the key card which is dropped by this guard, and so you need some weapons to get it.
The Yellow Security Pass fits into a slot back down both ladders. It closes a door in front of the underwater fan, removing the current and accessing a safe way into this tunnel. The nearby ladder will take you to an area where you can return to the pool instead of a hellacious backtrack.
This passageway will take you (after pulling an underwater ever along the way) to a small room with yellow, harmful lasers. A good way to get over them and to the block behind, jump from the middle of your current ledge. Another underwater passage there leads to a huge loading bay with several crates, a prisoner (who is game-rigged so he cannot help you fight the next couple of guards. This is done so if in the case that he kills all the guards or the one with the Blue Security Pass, so you wont need your weapons and possibly end the level without them. Of course, to finish the level you still need another Yellow Security Pass which is found high above and the prisoner cannot reach there, but the game producers seem to of forgotten this) and a pacing guard up top.
Up on the crates as soon as you enter is a small, crate filled room, and a small button that opens the nearby door. It leads to a small storage room with your Pistols, a Desert Eagle with three sets of clips, and a Large Medi Pack. At last!!!
Climax
Now that you have some weapons, you can backtrack to where you saw that guard with his back to you so as to get the second Key Card Type B and use it to get the second secret; A Grenade Launcher. If not, stay in this room and head up the obvious ramp until you can hear the main theme start, and symbolizing the start of a battle as it usually does. Several armed MP's will be up there, and a MP with club is racing up to an entry bay in order to release two more MP's with guns. If you use the Desert Eagle to kill the unarmed MP before he reaches the pad in which he releases the other guards, you wont have to worry about them. When you do kill them all and approach the yard with the metal gate to the left, a German Shepard will coming running from behind. One guard dropped a Blue Security Pass when he died. This fits into an electrical panel up a clear ladder near the yard. Inside are two buttons and a MP with a club waiting for you. One button (the furthest from the entrance) will unlock that metal grate, letting in a guard and his dog. However, the grate closes behind them, so it's best to just ignore that button to avoid these kills. The other button will activate a conveyor belt back in the ramp pathway, moving a crate down back to the loading room.
This crate stops beneath a ladder you could not reach before. Either now or earlier you would of noticed the pacing MP above you. The gratings on the ceiling allow you to traverse to a hole beneath the glass platform in which the MP is moving, and so kill him and claim the third, yes third, Yellow Security Pass from his dead body. This fits into that yellow electrical panel back on the floor of this loading bay, and opens the nearby grates to the next area, the outdoor loading area. Two MP's hide out here; one coming from the left, another in the big storage hangar by the truck. Two clear, closed, gates lie opposite the truck and into the open Nevada roads. In the storage hangar, you can find some Desert Eagle clips in a hole, and those are important in the next level.
To end the level, just step inside the truck to activate a cutscene.
Stowaway
The cut-scene begins with Lara stepping into the inside of the truck. Oddly, she holds no weapons in her holsters. Suddenly, she hears a noise from outside in the storage hangar and quickly runs around the perimeter of a soda crate-box and crouches behind it, peering over. Two men close the doors to the back of the truck, sealing Lara in. Feeling safer, Lara stands up, looking around, and hears the ignition of an engine start. She ducks down and pulls out a soda out of the crate, opens it and starts drinking.
"You’re all ready!" calls one of the men who closed the doors from outside the truck
"OK, see ya." says the driver, and the trucks starts to move. Lara almost falls over as it does, and then pulls herself onto the crate, finishing her soda as the truck exits the High Security Compound and into the Nevada Desert. It's destination is Area 51.
Area 51
Area 51, the final and most difficult of the Nevada levels, has always been of great specification by numerous people across the world. It is most famously heard of as a location of alien autopsy and examination, and holding bays for unidentified flying objects. This level starts off as showing no interesting alien evidence, but later on you may encounter many strange un-earth experiences, such as a bigger-on-the-inside UFO, a discontinued alien autopsy, an alien in preservation mounted on the wall and several others. Element 115, the Nevada meteoric artefact, is located at the very centre of the UFO. Do remember that these artefacts were formed by the planets, as Willard stated, so this may link to the whole alien idea. Area 51 begins in ventilation ducts and the highest floors of the base, before you descend into the mysterious depths that lie within. Combat is tough, with heavy armored guards with a dangerous gun combined with a laser-sight. Note, these enemies will fire a few, last, powerful shots when they die, so watch out, stepping over or away before they shoot. Only two prisoners can be found, and they're found only at the beginning, although you now have some weapons to use against your enemies after the hellacious retrieval in the last level.
An very important note is that of Electronic Hand Pads, which you may of seen in the previous level, but pose much more of a threat to you now. In the beginning of the level especially, guards will attempt to reach the hand pad to activate lasers, close storage doors (leading to some significant pick-ups) and in one case, close a grating to one of the secrets. The solution is to kill the enemy quickly, and very quickly at that. The Desert Eagle seems the only gun powerful enough, but others may suffice.
Gun Turrets also become much more numerous, but either in this level or the previous you will notice that Lara will aim at these turrets as if they were alive, and that's because she has the option to destroy them if necessary, although you never have to. The Desert Eagle is suitable for gun turret destruction, with five shots required to destroy one. If destroyed, any harmless lasers that caused the turret to fire do nothing, making things much easier, but with the expense of losing quite a lot of ammo, and if you do shoot it it will immediately target and fire.
On a final note, you have the option to reclaim (or claim) the Shotgun and MP5 early on in the level, and feel pretty free to use a proportion of the latter to aid you in the level, as you will definitely need it.You begin the level behind the very same crate Lara found the soda in the previous cutscene, in the truck, and in an Area 51 loading bay. The MP5 is found very close, but you have to defy a hand pad and there's a very easy way to do it. For your information, when you pass the metallic corridor ahead, a guard will appear a run towards a near pad just by a big red sign that shows that the alcove contains an MP5. You'll have to sprint quickly into the MP5 room before the guard uses the hand pad to activate fatal red lasers that block the entrance. When you inside, you can kill the guard with your pistols, and use the switch to deactivate the lasers if he activated them when you were in the room. Don't forget the MP5, and two clips to go with it.
The next section is in a ventilation system accessed by a button. Moving Lasers make their debut. Moving Lasers sweep in a left to right or forwards backwards direction, and can badly harm Lara. Usually, you can either crawl or use a monkey-swing frame to bypass it. After this first moving laser lies another stealth challenge; a guard is pacing the hallway ahead, moving to the right, just after a small crawl-space. You need to kill him before he reaches a hand-pad which activates lasers, although they don't stop you from doing the next section. A prisoner can be located to the left, in a cell opened by a switch. He doesn't do much to help.Past more crawl-spaces is one more little stealth element. You can see a MP standing up ahead, and if he sees you he will dash to a nearby hand pad, which closes a door to a room with Harpoons, a Rocket and Grenades. You may also see one of those aforementioned armored guards patrolling outside the windows, and the switch by the grating (and behind it you can see five switches, you'll come to that much later) and you plummet to the area with the guard (who doesn't notice you yet). There is another hand-pad here, which the guard will use if he sees you and close the grating to the first secret, and release two dogs. You will have to use the Desert Eagle to kill him quickly enough so he doesn't reach that pad. Remember, these enemies shoot even when they die, so if you're in front of him get out of the way to avoid unnecessary health loss!
A small switch down there on the catwalk unlocks a grating opposite the secret. You may notice there is a guard down there too, and to get to him and the grating (no pad this time) you must find the trapdoor on the catwalk which sends you down there. The open grating leads to another trapdoor above a huge metallic walkway, where the Shotgun can be re-claimed in a small crawl-space which shortcuts past two sentry turrets. You also have the option to release the final prisoner, who can pass through lasers without setting off the turrets, and help you with the several following guards. One guard can be seen at the end of the metallic walkway, and two more come out when you pass the threshold of the open doorway (which closes). A ventilation duct re-access the point past this door.
Hangar Access
The next area is all to do with missiles. On the T-Junction, the right leads to a room holding a huge yellow missile, and the left leads to a large missile construction room. In the room with the huge missile another guard will drop a blue Code Disk. This fits into a computer in the other room (over some gun turret activating green lasers) and raises some missiles so as to reach a ladder.
Another guard will drop a Hangar Access Key when he dies once you're up there. This fits into a panel at the bottom of the huge-yellow missile room, at the end of a small corridor leading off behind it. The obvious hole in the floor near the panel leads to a room which requires a Launch Code Pass to launch a missile (which is required).
Using the Hangar Access Key provides access to a small station, where the guards of the base use electrical cars to get to the other small station some way away. The electrical cars travel along an electrified track, but we don't actually get to use the cars. Lara does have to move one, but only to access an above ventilation system to get the rest of the way, as due to the position of the track, you cannot get past any other way. Up in the ventilation system, moving lasers sweep the ceiling, and you must carefully use the monkey-swing grating and to get past so as not to get sliced.
You can find a large room with two catwalks, a central computer, and two sealed doors in front. A MP here will attempt to run to a Hand-Pad to activate a gun turret, so make sure you kill him before he gets there. The deal here is to press the two separate buttons, one on each catwalk, to open those two sealed doors and get through them before they close, as they're sadly timed. You might as well push both buttons in no particular order first (as one door will remain open for longer) so as to deal with the two guards who appear, one on each button. Then push the button which lasts longer first, then the other button, and then sprint through those open doors to find yourself in that room with the five switches you saw through the grating much earlier on.
The second, fourth and fifth switches will open the doors to the UFO containment. Head back there (either ignoring or killing a guard in the switch room) through the doorway next to how you came in and briefly view the massive, unearthly craft. You need another Code Disk to get in, so instead push the nearby button to lower a trapdoor at the top of the nearby ladder, and head up, backflipping off to reach a ledge high above the containment room, and then to a ledge just above the UFO, where you can see the Launch Code Pass on top of the alien spacecraft. You have to do a hellacious backtrack in order to use it, and it is essential. You have to make your way back to that aforementioned hole, just after the room with the yellow missile. You have to launch it in order to reach the area with the second Code Disk.
Upon using the Launch Code Pass in it's respective slot down the hole (and below the missile), the cover on the Cover Switch will raise, revealing the button to launch the yellow missile.
|
Cover Switch Bug It is possible to use the switch behind the cover without having to raise the cover. This page will explain how to do this: - Cover Bug |
Watchtower Area
Using the button will activate a cinematic where the missile is about to launch. Very Quickly, you have to run through the now open door, using the look button to remove the cinematic, to escape the extremely dangerous missile exhaust fumes which spread rapidly. Once the missile has been launched (to wherever it's going), and the fumes disappear, you can return to the room which housed the yellow missile and now access a whole new area, as a ledge was knocked down when the missile was launched. A MP is up there, along with a switch which takes you to an area with a watchtower looking over an electric fence and the Nevada sunset-coloured sky, with a guard watching from on top. You can use your MP5 to kill him, and another MP lurking on one side of the courtyard. One more guard lurking in the adjoining control room will drop the second Code Disk on his defeat. Instead of taking an enormous backtrack to the UFO containment room where the disk is used, you can use the switch in the room to lower a trapdoor back in the yard, which will take you directly back to the UFO containment room, where you can utilize the Code Disk in another computer.Alien Evidence
Using that Code Disk did four things:
- Lower the trapdoor in the UFO, where the Element 115 is kept
- Open a nearby door to a discontinued Alien Autopsy
- Open a nearby door to the area outside the Orca tank.
- Open the door to the third secret, providing access to the inside of the Orca tank
If you do go to get the third secret, the Orcas are friendly, gentle creature and will not harm Lara.
Inside the Discontinued Alien Autopsy room, the one alien on the examination table seems lifeless, large and even as far as scary. In the room outside the orca tank, you'll find an alien mounted upon the wall, freakily looking out (dead). Anyway, it's time to complete the Nevada levels, so climb up into the UFO's freaky interior. Inside, you will find that it is much bigger on the inside, and that the walls, ceiling and floor are covered in a horrible, fleshy, substance which squishes unpleasantly under Lara's feet. The trapdoor will close as you move on, and up into the next floor, where steam can be seen ventilating off the floor. A guard is waiting for you at one point in the room, where a hole in the ceiling provides access to the final, central room.
In this huge, metallic green, room, several aliens can be seen also mounted on the walls. Strange, alien devices can be seen, and these seem like driving devices. Watch out for some invisible, harmful lasers around the mounted aliens, if you want to explore the room. On the central pedestal is the Element 115. Two guards will appear when you approach it, so quickly run to it and grab it to end the level, and the Nevada section.
Nevada Statistics
| Level No (Considering all possibilities) | Nevada Level | Number of Enemies (Maximum) | Types of Enemies | Number of Secrets | Types of Traps and Obstacles | Significant Finds |
|---|---|---|---|---|---|---|
| Either 05, 09, or 13 | Nevada Desert | 29 | Vultures, Rattlesnakes, Workers | 3 | Rolling Boulders, Current affected water, Electric Fences, Barbwire, Quick sand, | Detonator Switch, Generator Access (Card), Quad Bike |
| Either 06, 10, or 14 | High Security Compund | 13-14 (Excluding Prisoners, and guards killed by the prisoners) | MP with club, MP with pistol, German Shepard dog, | 2 | Gun Turrets, Fire Emitters, Barbwire, Stealth obstacles, Weaponless Situations, Lasers, Current Affected water, Fan Blades, Hooks | Pistols, Desert Eagle, Grenade Launcher, Keycard Type A, Keycard Type B (X2), Yellow Security Pass (X3), Blue Security Pass |
| Either 07,11, or 15 | Area 51 | 31 | Laser-point Guards, MP with club, German Shepard dog | 3 | Security Hand Pads, Moving Lasers, Electrified Track, Gun Turrets, Lasers, Hooks, Missile Exhaust Fire | MP5, Shotgun, Code Disk (X2), Launch Code Pass, Hangar Access Key, the Element 115 |
Area Selection - Next Location
| The Antarctica section concludes Lara's adventures. You can only come to this cold part of the world after completing all three of the non-linear section |
| The London section, the most difficult focuses on finding the Eye of Isis which Stephen Barr brought to England. Lara travels from the rooftops of London, to an abandoned tube station, and then to the underwater passages beneath the immense building belonging to Sophia Leigh, the owner of the artefact. |
| Among the scattered islands of French Polynesia is a cannibalistic tribe descended from the Antarctica Polynesians who fled. Their ruler, the Puna, owns one of the meteoric artifacts, and Lara must make her way through the tribe settlement, then a dinosaur infested crash site, followed by the gigantic Madubu Gorge, before descending into the Temple of Puna. |
London
Overviews
London, the capital of the United Kingdom and England, is one of the locations on Lara's list. She is now looking for the meteoric artefact which Stephen Barr sold upon his return to the city. Unknown to Lara, this artefact was sold to cosmetic tycoon Sophia Leigh, who has been using the powers of this meteoric artefact, the Eye of Isis, to give her immortality, or as close to it as she could get. Her office lies in the heart of the London district of City, hence why the last level is called 'City'. The four London levels are the most difficult to complete of the non-linear section of Tomb Raider III. As said long before, the levels are very intricate, detailed and complex, especially Aldwych, but these levels can influence a very good game atmosphere. After studying a map of London, the order of the levels in terms of location seems adequate; the locations in each level are pretty close, such as St Pauls is only a few streets away from Aldwych, which makes chronological sense if All Hallows took place between the first and second London levels.London was founded mostly in the Roman times, when it was called Londinium. The famous monarchy was instituted in 1066 by William I, and lasted until 1649, when it was abolished at the end of the English Civil War. The monarchy was re-instated in 1660 and has lasted to today. The modern city of London is comprised of many districts, an underground network of train stations and several famous landmarks. Most people live in the area around the outskirts of London.
Thames Wharf Overview
Lara begins the London section on a ledge high above the city, in the level Thames Wharf. Thames Wharf is an actual location in London, but is so far away from where the other locations are set can't be that. Thames Wharf here is generally a large industrial estate. St Pauls Cathedral can be seen across an enormous gap in the skyline. The main objective of Thames Wharf is to first cross the rooftops of the wharf, and through the industrialism by the Thames, and then enter the Thames Barrier. The Thames Barrier is a massive flood-control construction, built between 1974 and 1984 to minimize the chances of severe flooding in the heavily populated city. Here, Lara uses many switches to control the amount of water entering several large tanks, and to access an underwater tunnel leading to an abandoned part of the St Pauls Cathedral, where Lara can then get to the roof of the colossal cathedral construction. After a small ambush, Lara enters the abandoned Aldwych tube station via a bell tower (this is where All Hallows would come in).
Aldwych Overview
A lot of information can be collected about Aldwych tube station. Here is a piece of interesting information about the station. Content details such as dates and names are from Wikipedia.
Aldwych tube station was closed in 1994 due to a lack of passengers using the branch-line between Holborn station and Aldwych, and also because of the large price of fixing service lifts which often broke in the station. The station was located in the small London location of Aldwych, surrounded by the Strand. Aldwych is the terminating station, and the only station, of the small Holborn division line, leading off the Holborn intersection station. Despite it being separate, it's still part of the Piccadilly Line, which travels from south-west to north-east (blue line on left image). The station opened as Strand Station, on the 30th November 1907, on the site of the Royal Strand Theatre, and was not originally intended to be a terminating station. It was to be the southern station for the Great Northern and Strand Railway, which was to run from Finsbury Park in the north to the Strand, but this idea was rejected, and Strand became a small, terminating branch. The station was renamed "Aldwych" in 1917 so that the tube station name 'Strand' could be given to what later became the Northern line part of Charing Cross. It was temporarily closed in 1940 when it was used as an air-shelter in the London Blitz. Other parts of the station held artifacts from the British Museum to keep them safe in the air-raids. It was re-opened in 1946 and it lasted until the 30th September 1994, when the repair cost of an faulty elevator was uneconomical for the London Underground service. It was left abandoned and sealed off, and it's name was removed from the London Underground map.
[4] Nowadays, the Aldwych tube station has become a popular location in movies and television series. Aldwych was used in one episode of Most Haunted Live! Total Darkness and was also used in movies such as 'Creep' and 'V for Vendetta', as it has been mostly preserved (not by human hand) and is a ideal location for many genres of films, especially horror.Aldwych/Strand Facts:
- In the real station, there are only two platforms, whether the Tomb Raider version states three (or more).
- The use of Aldwych was replaced by the nearby station Temple, which was better connected than Aldwych.
- The abandoned station was also used in ITV Drama show 'Primeval', 'The Bank Job' movie, 'Superman IV' and 'Patriot Games'.
- More famously, Strand Station was used in the 2008 film 'The Chronicles of Narnia: Prince Caspian".
In Tomb Raider III
Core Design have done a very good job in creating the interesting ambience of the Aldwych level. This level takes four years after the station was closed, and the effects of this lengthy period can be seen in the level. Parts of the tube tunnels have collapsed, land-slides can be seen, and some parts of the station have become waterlogged. The background noise, which is evidently unique to the level, is a the sound of metal creaking and the wind whistling from above, creating more of an effect of the level's environment. However, in Tomb Raider III, the station (which is much bigger in the game than in real life) is home to a gang of deformed, mutated beings, christening themselves "The Damned" and their equally mutated dogs populate the ruins. These beings were, as it was revealed at the cutscene with the leader (Bob) at the end of Aldwych, failed experiments of Sophia Leigh, who dumped them through the waste disposal system and into Aldwych, presumed dead. There they exist, hiding in secret from the normal Londoners above them, disassociating themselves from society. The results of Sophia Leigh's experiment with the Eye of Isis artefact caused these once ordinary men to be faceless, and immortal (which Sophia was testing for). It is actually unknown whether only Bob or the whole Damned are immortal, but if it is the latter, Lara may be only stunning the Damned instead of killing them, but there is no proof of this factor.
A new and unique trap to the Aldwych level is the several underground trains, which, if they hit Lara when she's on the tracks, will instantly kill her. This trap has not been properly thought about, because of the location of Aldwych station. It is a terminating station, first of all, which means that there should no trains coming or going from abandoned Aldwych as it finishes there. Also, as there is no other station on this Holborn branch, no train should even be coming down here if the track isn't already closed off anyway. The station is much bigger in the game than it is in real life. The game designers only influenced this factor because if it was too small, you would not be able to get a decent level from the area. Finally, the use of the Old Penny seems obsolete. Devices which use and give the Old Penny should not be there as those particular machines would of been removed at the point of British decimalisation on the 15th February 1971, where the Old British currency was changed to the current currency of the pound.
The level focuses on the collection of many different keys and objects to reach the main lair of the Damned, fighting many of their gang members on the way. At one point, you will experience a large construction drill, cutting it's way through a deep shaft in the station, attempting construction. You will often be forced onto the tracks so as to reach some adjacent tunnel, and almost always you'll encounter an oncoming train which you must dodge by sprinting into that tunnel. You will require a Maintenance Key to get an Old Penny, to get a Ticket and two Solomon's Keys to get a Masonic Mallet, to indirectly access the entrance to the lair of the damned, where Lara becomes friends with their leader by promising him some Embalming Fluid from the british Natural History Museum.
'Lud's Gate' and 'City' Overview
Lud's Gate derives its name from the London district of Ludgate, and Ludgate Hill , which is very near Aldwych and St Pauls. Ludgate was the most western gate of the London Wall, which was built around the city by the Romans for access to roman roads. There are many "-gate" suffixed places in London which were once locations for these numerous gates, such as Aldgate or Cripplegate. However, the Natural History Museum, where half the level takes place, is located very far away from the area of Ludgate and Aldwych. There, inside the museum at nightfall, Lara uncovers the Embalming Fluid inside a mummy preservation room, and then delivers this back to the damned who trade it for direct access to the basement areas of Sophia Leigh's corporation building and also, they give her their Underwater Propulsion Unit, the London vehicle. The UPU, for short, is the only vehicle in the game with the ability to launch a weapon (in this case Harpoons, but only the ones you have collected so far in your inventory, not an unlimited source like in the previous game) and can dramatically accelerate Lara's swimming speed. On the other hand, the UPU is very difficult to handle in the water, and you have to register that it is the Jump button which controls the UPU, not the action button, which in this case launches the Harpoons. The UPU does not have automatic targeting, so you have to be careful when using it so not to waste ammo (unless you already have the Harpoon Gun, which you can use instead of the firer on the UPU). Even if you can't control it, you should definitely try to park it somewhere useful, as this level has an unusual amount of swimming involved, and some of the periods underwater can harm Lara unless you have the UPU to speed up the process.Anyway, in the level, there is only one Key (the Boiler Room Key) and of course, the Embalming Fluid. Enemies include Museum Guards armed with a single pistol, and an old classic baddy from the rig and Maria Doria levels of Tomb Raider II; the Frogman. This time, they are much less numerous (there is only four in the level and the game) and are much easier to defeat, taking only one Desert Eagle shot or the equivalent of four harpoons. They themselves are armed with a Harpoon Gun, but they don't have to reload like Lara does after every fourth shot. You will also encounter Crocodiles for the first time, or the second time if you completed the South Pacific prior to London.
The level concludes with Lara jumping her way through Sophia's building, and into her office for a confrontation with her.
Sophia escapes after arguing with Lara, into the area outside her office where Lara battles her in the next level "City". By the term "battle", I do not mean with weapons as she is immortal and indestructible to any weapon, but not electricity. The Eye of Isis is used against Lara as Sophia launches beams of compressed atmospherical energy from her scepter, which the Eye of Isis is mounted onto. These blasts harm Lara, especially if they hit her directly. An important note is that Sophia has to recharge the Eye of Isis and absorb more energy after a period of shots. Do not get hit with the first shot she fires from her scepter after recharging, as this shot is dramatically more damaging, taking away two thirds of your health. The objective of the level is very simple; just to climb up blocks and ledges, and one ladder and to activate the electricity under a metallic walkway on which Sophia should be standing on at the time, and kill her. As Tony, or the Puna, she will incinerate in a blast of blue shock-wave energy upon her defeat, and the Eye of Isis is left upon her defeat (although you have to deactivate the electricity using a button or you'll end up the same way as Sophia).
Thames Wharf
The Thames Wharf level is the most simple of the London levels, but is still intricate to a certain degree. This level can easily be divided into two sections; the Thames Wharf Industrial estate, and the Thames Barrier area (followed by the rooftops of St Pauls Cathedral). To access the Thames Barrier, Lara must make her way over the rooftops and interiors of the industrialism, using a key (The Flue Room Key) to indirectly provide access to the barrier. There is a range of enemies in this level, including Crows (their debut appearance), Rats, Sophia Leigh's assassins (armed with a laser-sight rifle) and the Barrier Guards (armed with a single pistol). If you have completed the Nevada section you'll see that Sophia Leigh's assassins resemble the Area 51 guards, but with a different appearance and a distinguishable British accent when they shout "Hey!" after noticing Lara. These assassins, like the Area 51 guards, will shoot several more damaging shots upon their death, unnecessarily taking some of your health. Make sure to get out of their line of fire to avoid this from happening. The Barrier Guards do the same, but only shoot one shot after dying which tends to miss depending on how far you are from them. Crows and Rats don't need much tactical analysis, and are both easy to kill, but is it is worth noting that Rats always come in pairs.In this level you will experience an apparently endless drop in the skyline, between the industrialism and St Pauls. If you fall into it, you'll die (you probably wont see her die, but the Game Over screen will appear soon enough). The only safe way across (aside the huge level shortcut using the crane in the middle of the skyline chasm) is an underwater tunnel accessed by correctly completing the Thames Barrier section, which directly leads to St Pauls.
The Industrial Estate
Anyway, you begin the level on a ledge overlooking the skyline chasm and St Pauls. The first secret can be found by using the crane structure. The first section of the industrialism is to claim the Flue Room Key from a Sophia Leigh Assassin, in a small estate accessed by a zip line. You will experience a crow and some rats in the process. When fighting the assassins, don't overlook the use of the MP5 or Grenade Launcher if you have any of these - they work well.
Then, using a switch, a trapdoor can be lowered to access an area below it, with five openings. One of the five openings leads to a switch (through a long crawl-space) which raises the cover on a Cover Switch someplace else. As you can't go anywhere from this point, you must go back along the crawl-space to the openings, then to the courtyard at the bottom of the estate, and use the three long ladders to reach back where you started the level.
You wont be able to re-use the zip-line as the handle was moved when you used it, but you don't need it anyway, The deal is to reach the platform where that little Small Medi Pack lies, and you can use the crack in the wall to shimmy all the way to the right and pull up to another area.
For your information, the path to the Thames Barrier is on the left hand path (the one leading up), but a Fire Emitter stops you from accessing the tunnel. The Cover Switch you raised is up on the right path (past the British flags on the scaffolding), guarded by a lone Crow. This switch lowers the scaffolding so it is level with a small alcove with the door requiring the Flue Room Key.
A Flue Room is generally an area where exhaust fumes, from places like factories or even kitchens, can be released. The one here is currently inactive, and larger than a normal Flue, but the whole concept of a Flue Room fits the whole Industrial Estate construction idea. Inside this Flue Room is a button which turns off the burner that denies you from getting to the Thames Barrier, but also activates the fire emitters in the room, which must be avoided so you can return to the entrance. Sadly, you can't return to the ledge leading to the Cover Switch, as it is too high, so instead Lara must take the long path through the nearby long crawl-space leading to the five openings, then to the courtyard, and then to the ladders to once again return to where you started the level.

